Markers
Action Markers
One of OtO’s missions is to restore the speaker’s role as the conductor. Thanks to Action Markers, OtO can orchestrate all events around the text, from advancing PowerPoint slides to playing jingles, launching videos, and controlling lights
How do Action Markers work?
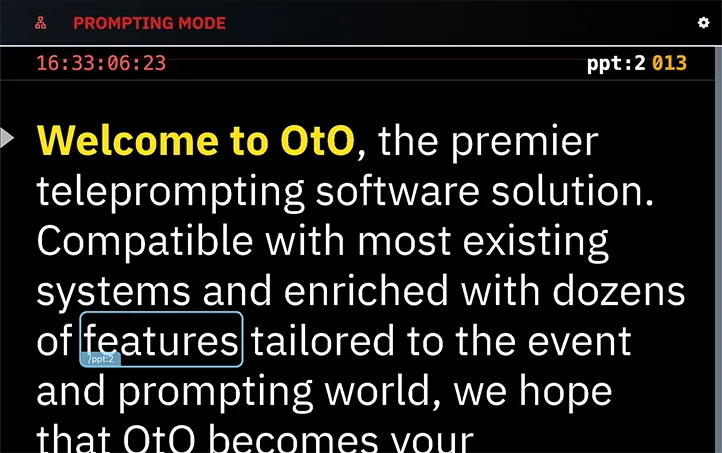
ActionMarkers are just like other markers, except they trigger events (like passing slides, playing videos or sounds etc.) when the text scrolls and the marker passes in front of the ▶ cue indicator.
ActionMarkers are first created as standard markers, meaning you need to select a portion of text and then either click the button or use the shortcut CTRL + M or ⌘ + M. Afterward, to "convert" them into Action Markers, you must use a specific syntax, as explained below.
This syntax determines the type of action the marker will trigger, allowing you to control external events, such as slides, sounds, or videos, during your presentation.
ActionMarkers are automatically triggered in prompter mode only, when the text scrolls and the marker passes in front of the ▶ cue indicator.
This ensures that actions are executed precisely at the right moment during the presentation or performance, aligned with the speaker's pace. The trigger is signaled by a slight flash lasting about one second.
You may still manually trigger action markers on certain conditions, see below to know how
MARKER OFFSET SHIFT
The actionMarkers will be triggered as the text scrolls and the marker passes in front of the ▶ cue indicator.
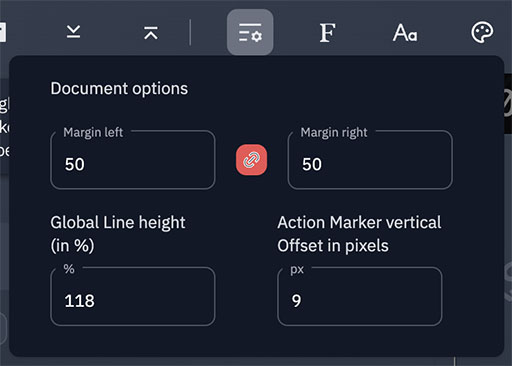
You can fine-tune the vertical offset (relative to the ▶ cue indicator position) in the margins dropdown. Click icon in the toolbar and enter a positive or negative value in the "Action Marker vertical Offset in pixels"
Time to next ActionMarker
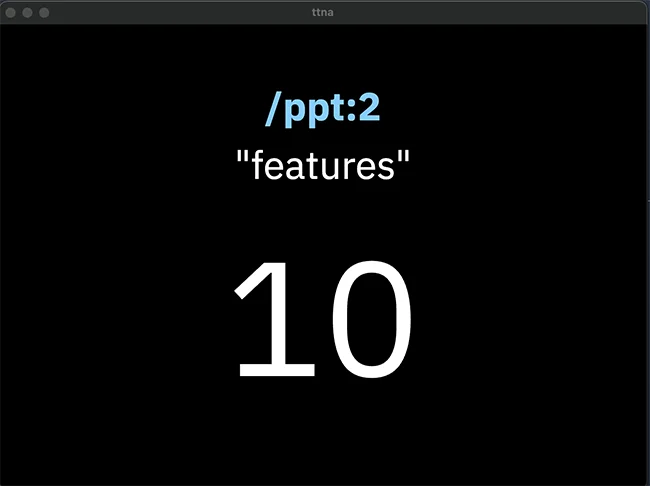
When the Show timer option is enabled (Option Menu → then Show Timer), the remaining time before the next Action Marker will be displayed as a countdown and will adjust according to the scrolling speed. This allows you—and potentially your team—to anticipate the upcoming event. It can be a valuable tool for cue operators, speakers, and stage managers!
You may also display (or hide) this countdown on the prompter window or external screen.
To do so, go to ⚙ Settings -> Markers and Timers -> then Show markers on external display, and enable "Show Time to Next Action Marker".
See the Overlay chapter to get more detailed informations.
Be aware that the countdown to the next marker will only be displayed when it is less than 150 seconds away.
Action Marker Features
Action Markers can trigger several types of events, and we will continue to expand this list with future updates:
MIDI
MIDI actions allow you to trigger MIDI events such as noteOn, noteOff, or a controller event (CC). This enables communication with a wide variety of devices for coordinating sound and lighting. Refer to the documentation of the equipment or software you wish to control to understand how it responds to these types of instructions.
Some well-known sound and lighting equipment for large events that can be controlled via MIDI include:- Pioneer DJ Mixers and Controllers for automated sound effects and transitions
- Martin Professional Lighting Controllers for synchronized lighting effects
- Ableton Live for triggering audio and visual cues during live performances
PowerPoint
You can easily control any PowerPoint presentation with OtO. Refer to the dedicated commands below as well as the PowerPoint setup guide for more details.OSC Servers and HTTP Servers
Beyond MIDI, you can communicate with audio or video systems that support the OSC (Open Sound Control) protocol or use a message translator like Osculator or atemOSC by BanyanAV to control Blackmagic™ Atem™ video switchers.
Similarly, you can send any conceivable request via the HTTP protocol to control external devices.
All of this is covered in the "Network Markers" section.Timers
It is possible to control the display of the OtO timer, set it to a specific time, pause it, or restart it as needed.
Creating an Action Marker
Creating an action marker differs slightly from standard markers and requires specific syntax. First you need to create a standard Marker, then you should enter a special description
The syntax to enter as a description for creating an actionMarker can be defined as follows:
/group:command(option)
Here’s a breakdown of this structure:
/Every actionMarker starts with a slash.group– Refers to the type of command, such as controlling slides, playing sounds, or triggering other events (see below for a list of compatible groups and commands)command– Specifies the exact action to be executed within the group, such as advancing to a particular slide or starting a video.(option)– Optional parameters between parenthesis that refine the command, such as slide numbers, sound files, or lighting settings.
Example:
To trigger the midi note E2 with a velocity of 120 (assuming you've set up a working midi device), the command would be:
/midi:e2(120) 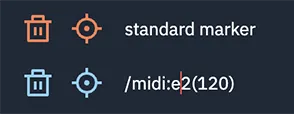
In this case:
midiis the group.e2is the command to trigger the E2 note(120)is the option, specifying the velocity level
This flexible syntax allows OtO to manage a wide range of actions based on the needs of your presentation or performance.
Default actions syntax
Here is the list of command types and commands natively supported by OtO and their syntax.
Group actions syntax
You can group two actionMarkers with the following syntax:
/group:command|group2:command2
This allows you to trigger multiple actions simultaneously. Here's how it works:
/– Starts the actionMarker.group:commandThe first group and its associated command.|The "pipe" symbol separates different actionMarkers, allowing multiple commands to be grouped together (note that you DO NOT start the second actionMarker with another / )group2:command2– The second group and its associated command (it can be any valid group:command couple, including the same couple than the first actionMarker)
Example:
If you want to change to next slide and play a sound simultaneously, the actionMarker would look like this:
/ppt:next|midi:e2
Manual triggering
There are 3 different ways of manually triggering an action Marker
- You can disable the "Trigger Marker Action on Scroll" option in:
⚙ Settings->Markers and Timers->Advanced Settings for Action Markers.
This way, markers will no longer activate on scroll but instead will be triggered by clicking the target button next to the marker name, which will change to a "play" button in this mode (double-click on it to actually trigger the marker).
This mode can be very useful for rehearsals, for example, where you may not want to trigger events at every turn.

Also, whatever the mode you're in (prompting mode or not), you can always trigger any action marker by right clicking the marker's name and then select
Trigger Marker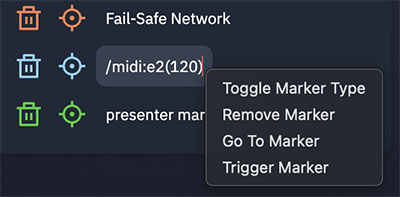
Finally, you can trigger the next action Marker (from the current position perspective) with the keyboard shortcut
CTRL+SHIFT+Tor⌘+SHIFT+Ton mac
Caller Support Window
OtO includes a dedicated Caller Support Window, designed to help show-callers and stage managers stay on top of timing during live events. This window displays the time remaining before the next Action Marker, providing a real-time countdown that can be essential for coordinating cues accurately.
The Caller Support Window can be moved to a third monitor or set as a floating window, making it easy to keep visible alongside other production tools.
To enable it, go to Menu Options -> Show Caller Support Window.
