Markers
Powerpoint and Keynote Markers
OtO allows you to control PowerPoint slide transitions in two ways:
From the same machine, directly via OtO
To any machine running PowerPoint, connected to the same network, via the "OtOSlides" utility.
Controlling PowerPoint Locally
To control PowerPoint locally, first make sure to disable the "Connect to PPT Server" option in ⚙ Settings -> Network, as this is used for network connectivity and every /ppt marker would then try to trigger a remote PowerPoint server.
Then simply launch PowerPoint on your computer and activate slideshow mode.
You'll need two screens: the first will be used to control OtO, and the second will be dedicated to displaying the full-screen slideshow.
Controlloing PowerPoint from network

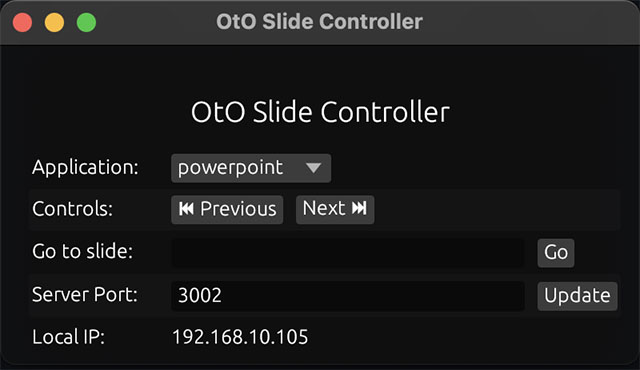
To control the progress of a remote PowerPoint slideshow from OtO, you need to install the small utility "OtOSlides" on the machine running the slideshow, which is available for download here.
Once this application is installed on the other machine (or it can be the same machine), launch it, take note of the IP address displayed in the application, and set your presentation to full-screen slideshow mode.
Launch PowerPoint in slideshow mode, then, back in OtO, go to the ⚙ Settings -> Network then in the field "Powerpoint Server configuration", enable the network PowerPoint option, and enter the IP address (the IP will be displayed in otslides user interface).
On Mac you can also control keynote by simply switching to Keynote Mode (just click on the 'Application' drowpdown menu in OtoSlides and select Keynote)
If you changed the Server Port in the OtOSlides app, update the Powerpoint Server configuration field accordingly. Simply append the port to the IP address after a colon :.
For example, if the IP is 192.168.10.2 and the port is 4001, enter:
192.168.10.2:4001 in the Powerpoint Server configuration settings.
You may click on the small CHECK button at the end of the field to check if the server responds.
Confirm the changes, and you can now control your presentation remotely!)

Creating a PowerPoint marker
To learn how to create a marker, please refer to the dedicated chapter. This chapter will provide detailed instructions and examples to help you understand the process thoroughly.
The syntax to enter as a description for creating a powerpoint actionMarker is:
/ppt:command
Here is the list of command supporterd by OtO and OtO-Slides to control powerpoint.
Importing Notes
You can also import notes from a .pptX file by navigating to the File menu and selecting Import Notes from .pptX
OtO will create a new text document from the powerpoint file, that aggregates all the notes from each slide in the presentation, separated by automatically created /ppt Action Markers corresponding to each slide. This setup allows the PowerPoint presentation to advance seamlessly as you read through the notes.
Keynote Mode
On the Mac version of OtO, You can also trigger Apple Keynote slides.
To do so, go to ⚙ Settings -> Markers and click on "Treat PPT markers as Keynote".
The Action Marker syntax (/ppt:) remains the same.
For remote operations, you can simply switch the OtOSlides app to Keynote Mode.